Showing posts with label crafts. Show all posts

Tuesday, October 25, 2011

Candy Corn Craft

 I have seen these cute candy corn yarn decorations before so this year I decided it was time to try making them! I had a weird experience while making them, it was easier than expected, yet harder than expected. Let me explain...

These little darlings, don't actually use any glue. The styrafoam acts as velcroe and holds the yarn well enough while you start wrapping the the multiple layers of yarn. When I was done with one color I would leave the end sticking up into the area of the next color so as I was wrapping the next color it would secure it. When I got to the top and was finished wrapping the white, I took the end and poked it into the top of the foam with a pencil.


I used the cheapest yarn I could find at Walmart, although I will say the orange wasn't that cheep. They didn't have a shade of orange that I liked in the cheapest brand, so I had to go a step up.


The foam cones I found at Jo-Ann's and I had a coupon. Good thing since they cost more than I thought they would.

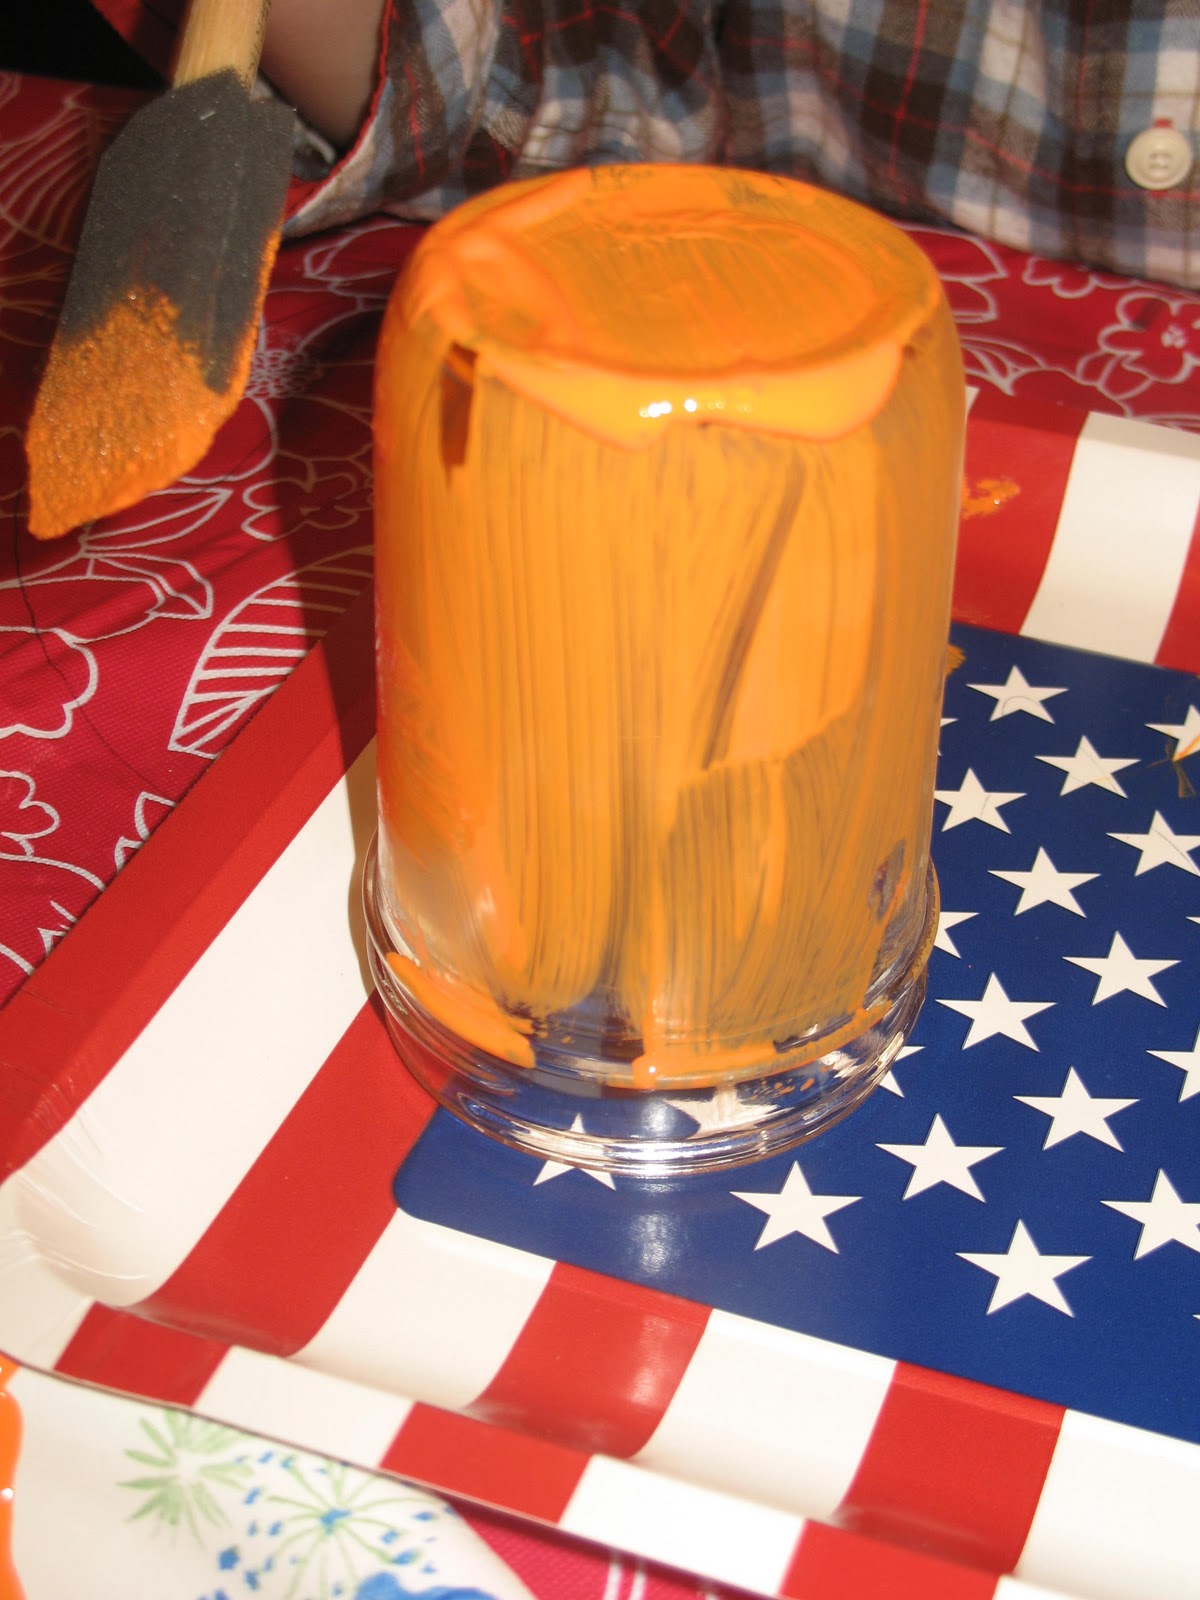
This project took me about two hours to complete, mostly because I was watching television while I was doing it. As you can see in this picture if you are looking at the cone from above you can see the top is still green, I think I will paint the top of the cones white with some acrylic paint so it blends better.


You can really make as many as you want, or just one, I just tend to like odd numbers of different sizes. They are super cute! I can't decide if they will be a center piece of my table, or on my fireplace mantle. Suggestions anyone?

Friday, October 14, 2011

Simple Halloween Craft

A friend of mine called me up the other day and asked if I would be interested in doing an easy Halloween craft with my kids, because she had some extra supplies from doing it with her granddaughter. I said sure and off I went to pick up the supplies. What was the craft you ask? Pumpkin jars! (My kids are having so much fun painting!!)


Here are the supplies you need: jars of different sizes and shapes (preferably without labels), orange acrylic paint, black acrylic paint and spray mod podge.


First you paint the jars orange, you can use a brush or your fingers! :)


Then you paint the tops of the jars black. 


Once the orange paint dries you then paint your faces on the "pumpkin" (We practiced different faces on paper before actually painting them. I also laid the jars down next to the paper so my daughter could see about the size she had to work with.)

                   
After the face dries then spray the "pumpkin" with the mod podge. This will help the paint not to chip and give it a nice sheen since the acrylic paint is flat.

Now we made a mistake while doing ours. I had the jars upside down as we painted the orange on them so that we could paint the bottom of the jar, but when it came time to paint the faces, I forgot to turn them right side up. So when you make yours, just remember the lid should be on the top of the pumpkin to act as it's stem. I think even though they are upside down they are still pretty cute on my porch! And it is always fun to do an activity with your kids, especially when it is a manageable activity with only 4 steps and no sharp knives!!

I went to Walmart and bought some battery operated tea lights in the Christmas section. I will put  one tea light in the small jars and two in the big jars. You'll have to forgive our camera, it isn't fantastic, but you get the idea about them glowing. 

Another great thing about these pumpkins is that they won't spoil and start to rot in a few weeks, you can keep them for year after year!! 

Friday, October 7, 2011

Halloween DIY


These cute Halloween decorations can be made very quickly and very cheaply. They are simply, used bowling pins (donated to me by my local bowling alley) cheese cloth, black paint pen, mod podge, and  brown stain. It is as easy as it looks. 
I simply draped the cheese cloth on the bowling pin for the ghost. I did put a dab of mod podge on his head to keep it in place. And his face is on the bowling pin, NOT the cheese cloth.
The mummy is wrapped in cheese cloth strips with mod podge painted on the bowling pin. After it was wrapped up I dipped a paper towel in some stain and rubbed it all over the mummy to make it appear to be dirty.  Simple and fast!!

Saturday, March 26, 2011

Make Your Own Wrapping Paper


So I had to make a big poster for a futures planning I did at work (I will share more about that later) and I had some extra Butcher paper.  Well, since yesterday was my mans birthday this past week my little guy and I made our own wrapping paper out of it.  I put some paint on his feet and walked him all over the paper.  It was very fun and lets be honest, whats cuter that tiny footprints?  You could also use your childrens/students artwork...or even your own, if you're good like that!!!   After he had unwrapped the presents I cut out some of the best footprints and plan on using some in his scrapbook, and some for other gifts.  Its not only resourceful but is really cute!!  Make your own!

Monday, March 14, 2011

Great St. Patricks Day Craft For anyone!

Ok so I don't feel like I come across too many great St. Patrick's Day crafts but I love this one.  I found it on one of my favorite blogs of all time.  Its one of my favorites and relates well to this site because of her advocacy for adoption (just like my grandparents who this blog is in honor of) in addition to her great ideas and posts... I consider it a must read!   I think this sweet project is perfect for a Special Education Classroom but also for you kids at home, preschool, kindergarten...whoever.  It is adorable!! I love love love it!
The little hands will make parents just eat these up!

(Photos by the r house)

And look at this cute finished product.

As a special education teacher I was always looking for simple projects that weren't too complex and didn't always require perfect fine motor skills but maybe some fine motor practice (cutting out the shamrocks!)  This was right up my alley.  Thanks Lindsey!

Monday, March 7, 2011

Art Week Day 5

Upcycled Mod Podge Bracelets
(Before)

 (After)
So we decided to fancy up the cheap bracelets we got at a thrift store.  We used Scrap paper and Mod Podge and had a blast doing it.  The one above was created by my sister.  I think she did a fantastic job.
The one below I created.
It was very fun.  Very easy.  And Very cheap!
Plus its always fun to make something cheap and old come alive again! 
Try it yourself. 
I love Mod Podge!

(Before)
(After)
I wish I had done more with mod podge with my students.  I think we could have done some fantastic crafts.  But you can bet I'll be making some with my own little ones!

Tuesday, March 1, 2011

Art Week Day 4

Duck Tape Purses and Wallets

So on day four of our art week we created these very fun, easy and adorable duck tape purses and wallets.  We decided to use clear duck tape because we thought it would be a little bit fun and different.  We have seen colored duck tape items but we didn't really find any colors we cared for and thought it would be fun to go with clear and add our own accents. 

This is a little wallet sized item I made.  I added a little paper flower accent to spice things up.  I decided to use it to store bobby pins!

This little purse opens and closes with a little duck tape tie.  This is my sisters, I thought it was very cute and fun.  Its kindof a clutch shape- Small and Slick.

Try it Yourself:  This would be very easy to do with almost any child over 4 (With help of course)  its pretty easy to fix any mistakes without much notice, and very fun to do!  Plus its very cheap!

Saturday, February 5, 2011

Something Sweet

So I thought I would share these sweet little things I made about a year ago for my Brother and Sister in Laws little girl.  They were for her to wear on her tiny feet on her blessing day.  I have made a few other pairs out of denim and other fabrics.  They are very fun to make and are so cute.  I haven't personally used any yet as I can't quite figure out how to make them look more boyish! 
Go make something sweet.....that phrase makes me wanna make something sweet....for my belly!!!

Tuesday, February 1, 2011

Crafty

I can be creative...at times.  Most of my creativity is best developed through the use of computers- graphic design, photography etc.  Some of my friends on the other hand are just plain crafty. 


I came across this gem that my friend Meredith made with her little girl (check out her blog for other cute crafts she has done-baby decor, reupholstered chairs etc.)  I love it! This is the perfect February decoration.  I just love how its just a random mix of reds and pinks and hearts and tags.  If I still taught in a classroom or my little guy was big enough to cut I would have my students make this with me (you can bet we will be making one in the near future!).  Its excellent for fine motor development, just trace some hearts hand them the paper and let them go to town. Then you can get your creative juices flowing and fill in the gaps.  Go ahead Moms, especially if you are living in the east and anticipating some more snow- what a perfect inside activity.

LinkWithin

Related Posts Plugin for WordPress, Blogger...